

Why Should You Open an Exness Account?
Exness is a solid choice for traders. It’s regulated by top authorities like the FCA and CySEC, so your funds are safe. The platform offers tight spreads, starting as low as 0.1 pips on Pro accounts, and leverage up to 1:2000. That’s a game-changer for maximizing trades. You get access to forex, crypto, stocks, and commodities, all on MT4 or MT5.
The flexibility is a big plus. Beginners can start with a Standard account, while pros like me prefer the Raw Spread or Pro accounts for faster execution. No commissions on certain accounts keep costs down. Plus, withdrawals are lightning-fast—often within seconds. Exness also supports multiple payment methods, from bank cards to crypto wallets, making funding easy. If you’re serious about trading, Exness gives you the tools to succeed.
How to Register for an Exness Account
Setting up an Exness account takes just a few minutes. I’ve done it myself, and it’s hassle-free if you follow these steps:
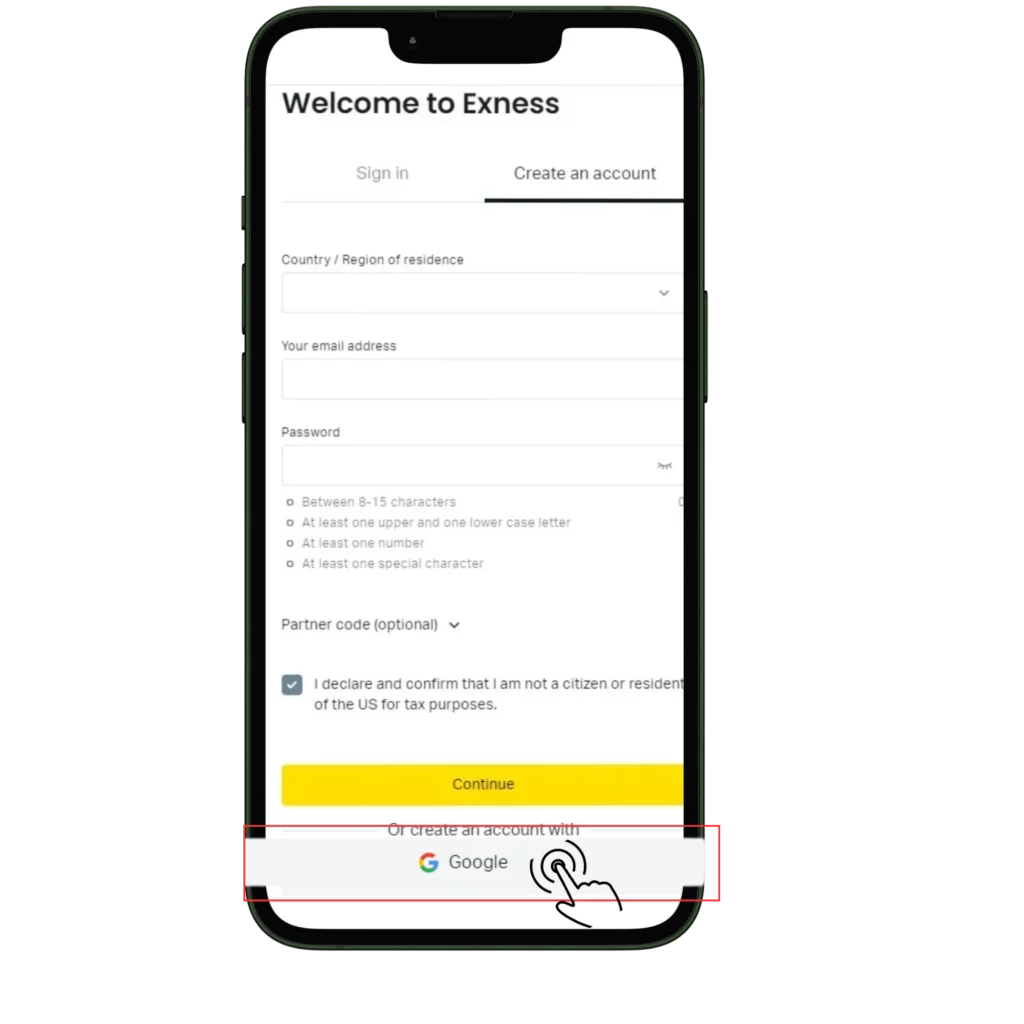
- Visit the Exness Website: Go to the official Exness site. Click the “Sign Up” or “Register” button, usually in the top right corner.
- Fill in Basic Details: Enter your email, phone number, and country of residence. Make sure your email is active—you’ll need it for verification.
- Create a Strong Password: Use a mix of letters, numbers, and symbols. Keep it secure but easy to remember.
- Confirm Your Email: Check your inbox for a verification link from Exness. Click it to activate your account. Check spam if you don’t see it.
- Log In to Your Personal Area: Once verified, you’re redirected to your Personal Area, where you can set up trading accounts.
Verifying Your Exness Account
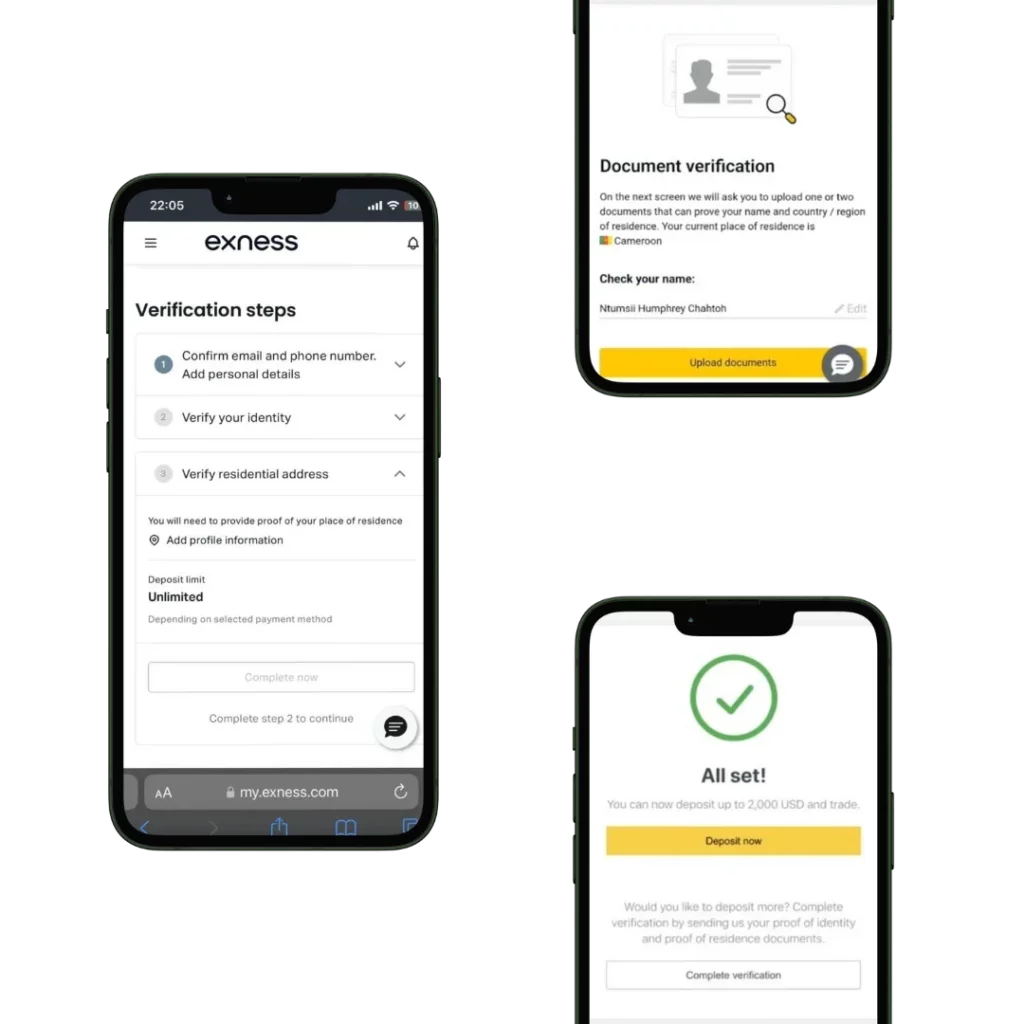
Verification is a must to unlock full trading features. Exness follows KYC (Know Your Customer) rules to keep things secure. After registering, log in to your Personal Area and head to the verification section. You’ll need two things: proof of identity (POI) and proof of residence (POR).
For POI, a passport, driver’s license, or national ID works. Make sure the scan or photo is clear, with all details visible. For POR, a recent utility bill or bank statement showing your name and address is enough. I always use a high-resolution camera to avoid rejections. Upload these directly in the Personal Area. Verification usually takes a few hours but can stretch to 24 hours if manual checks are needed.
One mistake I made early on was uploading a blurry ID. It delayed things by a day. So, ensure your documents are sharp and match the info you provided. If rejected, Exness will email you with specific reasons—fix and resubmit quickly. Once verified, you can deposit, trade, and withdraw without restrictions.
How to Fund Your Exness Account
Funding your account is where the fun begins. Exness makes it easy with options like bank cards, e-wallets, and crypto. Log in to your Personal Area, click “Deposit,” and choose a method. I prefer crypto for its speed, but bank cards are reliable too. Minimum deposits vary by account type—Standard accounts start at $10, while Pro accounts might need $200.
| Payment Method | Minimum Deposit | Processing Time | Fees |
| Bank Card | $10 | Instant | None |
| Crypto Wallet | $10 | Instant | None |
| E-Wallets (Skrill, Neteller) | $10 | Instant | None |
| Bank Transfer | $50 | 1-3 days | Varies |
How to Log In to Your Exness Account
Accessing your account is simple once you’re registered. Follow these steps:
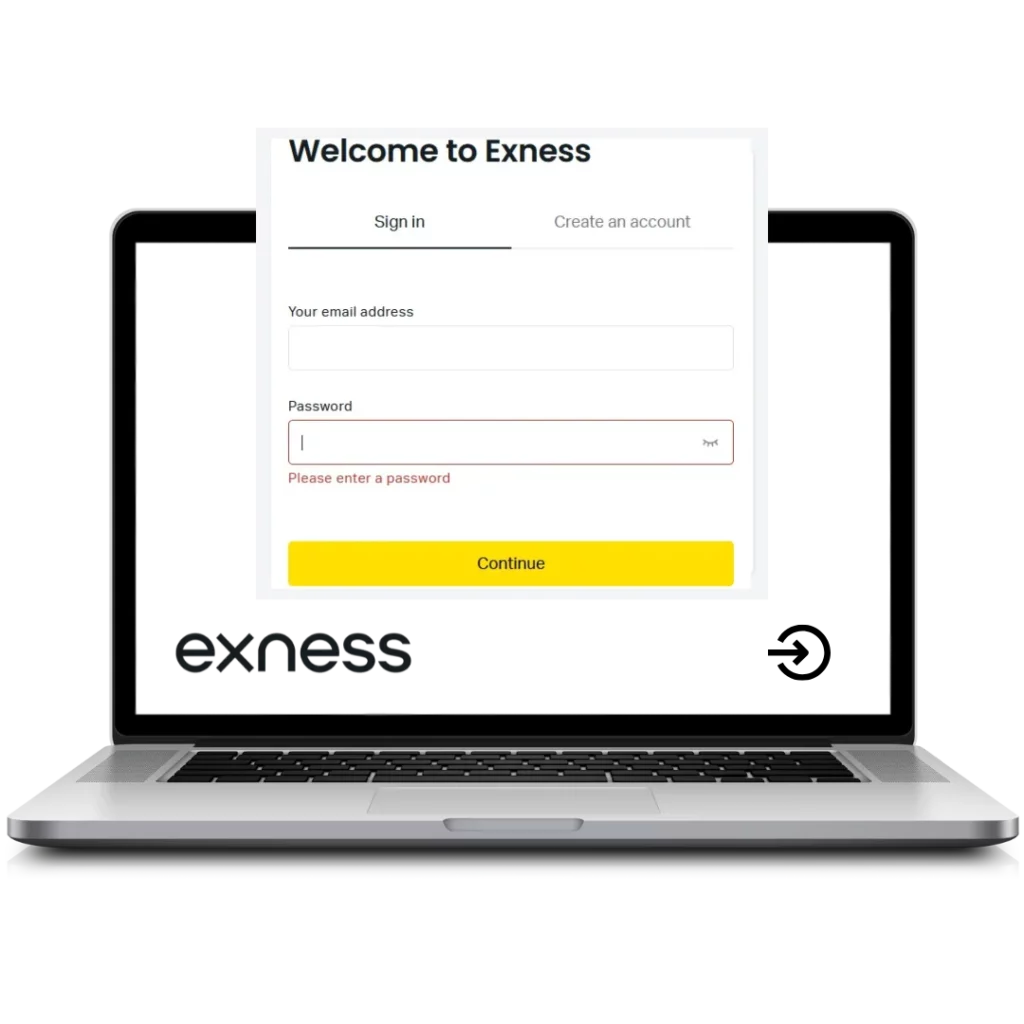
- Go to the Exness website or open the mobile app
- Click “Sign In” in the top right corner
- Enter your registered email address
- Type your password carefully
- Complete any security verification if prompted
- Click “Log In” to access your account
Two-factor authentication adds extra security to your account. Enable it in your security settings for better protection. You’ll need an authenticator app on your phone for this feature.
The mobile app offers the same login process. Download it from the App Store or Google Play for convenient trading on the go.
Common Issues and Troubleshooting during Registration
Email Verification Problems
If you don’t receive the confirmation email, check your spam folder first. Gmail users often find Exness emails in the Promotions tab.
Still no email after 10 minutes? Try registering again with a different email address. Some email providers block automated messages from trading platforms.
Document Rejection
Make sure your ID photo shows all four corners clearly. Passport photos need to include the entire document page, not just the photo section.
Address proof gets rejected when it’s too old. The document must be dated within the last three months. Screenshots of online bills don’t usually work – download the official PDF version instead.
Password Problems
Password problems occur when you don’t meet the requirements. Your password needs uppercase letters, lowercase letters, numbers, and special characters. It should be at least 8 characters long.
Country Restrictions
Country restrictions can block registration completely. If you can’t select your country from the dropdown, Exness might not accept clients from your region. Check their terms of service for the full list of restricted countries.
Phone Number Verification
Phone number verification sometimes fails with certain carriers. Try using a different phone number or contact support if the SMS doesn’t arrive.
What Happens After You Register?
Once you’re registered and verified, you’re ready to trade. In your Personal Area, you can open a trading account—Standard, Pro, or Raw Spread, depending on your style. I started with a Standard account to test the waters, then switched to Pro for tighter spreads. You’ll also choose your platform, MT4 or MT5. MT5 is my go-to for its extra features like more timeframes.
After funding your account, you can start trading forex, crypto, or stocks. Exness offers a demo account to practice without risking real money—perfect for beginners. You’ll also get access to analytics and market news in the Personal Area. Withdrawals are quick, often instant for crypto or e-wallets. Keep an eye on your leverage settings; high leverage like 1:2000 can amplify gains but also losses.

Trade with a trusted broker today
See for yourself why Exness is the broker of choice for over 1 million traders and 100,000 partners.
Frequently Asked Questions
How do I open an Exness account?
Visit the Exness website, click “Sign Up,” enter your email, phone, and country, set a password, and verify your email. Then, complete KYC verification to unlock trading.
Is there any fee to open an Exness account?
No, opening an Exness account is free. You only need to meet the minimum deposit for your chosen account type to start trading.
How to trade Bitcoin on Exness?
Log in to your Personal Area, open a trading account, and select BTC/USD on MT4 or MT5. Fund your account, set your trade size, and use technical analysis to enter trades. I recommend starting with a demo account to practice.
Why is Exness spread so high?
Exness spreads are generally low, starting at 0.1 pips on Pro accounts. High spreads can occur during volatile market hours or on Standard accounts. Switch to a Raw Spread account for tighter spreads, though it may have a small commission.
How to connect Exness to TradingView?
Exness doesn’t directly integrate with TradingView, but you can trade via MT4/MT5 while using TradingView for charting. Open TradingView, analyze your pair, then execute trades on Exness’s platform. Some traders use third-party tools to sync data, but I stick to manual analysis for simplicity.